Many companies implement a continuous integration (CI) strategy to deploy, build, test and release code incrementally. Once a release is ready, it will be tagged with a version and published to a repository where it can be easily installed with a few clicks by the user. There is no simpler and better repository than Packagecloud for 2 reasons:
- Packagecloud has integrations with many CI platforms with step-by-step instructions like this one for Travis CI
- Users can easy install those packages with Packagecloud’s install scripts, removing the need to understand the operating system where the package will be installed
To integrate your Travis CI workflow with Packagecloud, here are the steps:
-
- Create an account on Packagecloud, and then create a repository to store the software package that we build
- Create a Travis CI account by signing up via GitHub to enable access to your codebase
- Retrieve the Packagecloud API key and add/modify your Travis CI .travis.yml to contain instructions to build and publish the software package
Nomenclature
We use the word repository to refer to a code repository, e.g., GitHub, and also a package repository, e.g., Packagecloud.
We use the term package to refer to both software or programming libraries that maintainers/creators create for usage by others, with the subtle difference being the former refers to a piece of software that the end-user can use, e.g., a Slack desktop client, and the latter can be used as building blocks by developers to create software.
Create an account and repository on Packagecloud
You can create a new Packagecloud account here: https://packagecloud.io/users/new.
Once you’ve created an account, there is a simple wizard that will guide you through to create a repository to store your packages.
If you have already completed the wizard before and would like to create a new repository, login and go here: https://packagecloud.io
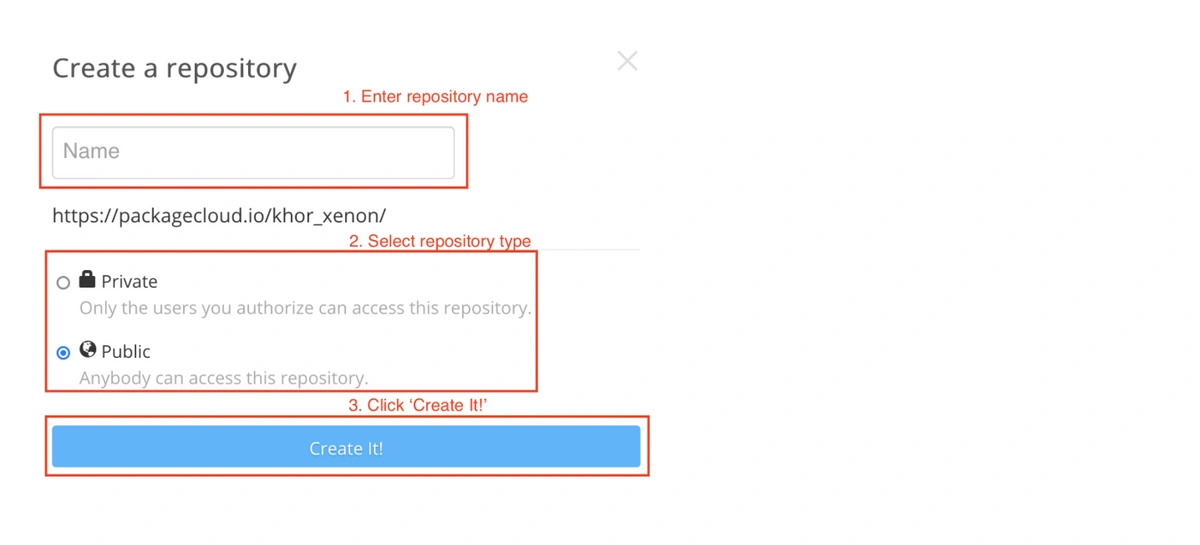
Click ‘Create a repository’

In the ‘Create a repository’ modal, fill in the details as follows:
Your Travis CI experience with Packagecloud
You could be in one of three situations here:
-
- Situation 1: You already use TravisCI to continuously build & test your code so you already have the ‘.travis.yml’ build configuration file. You are looking to push your package to Packagecloud for distribution to your end-users.
- Situation 2: You have a codebase that can only build a package. You are looking at setting up continuous integration with TravisCI to continuously build, test and push your package to Packagecloud for distribution to your end-users.
- Situation 3: You don’t have a codebase to build a package but want to get an idea of what such a codebase and continuous integration with TravisCI and Packagecloud looks like.
Create or fork a codebase that creates a package
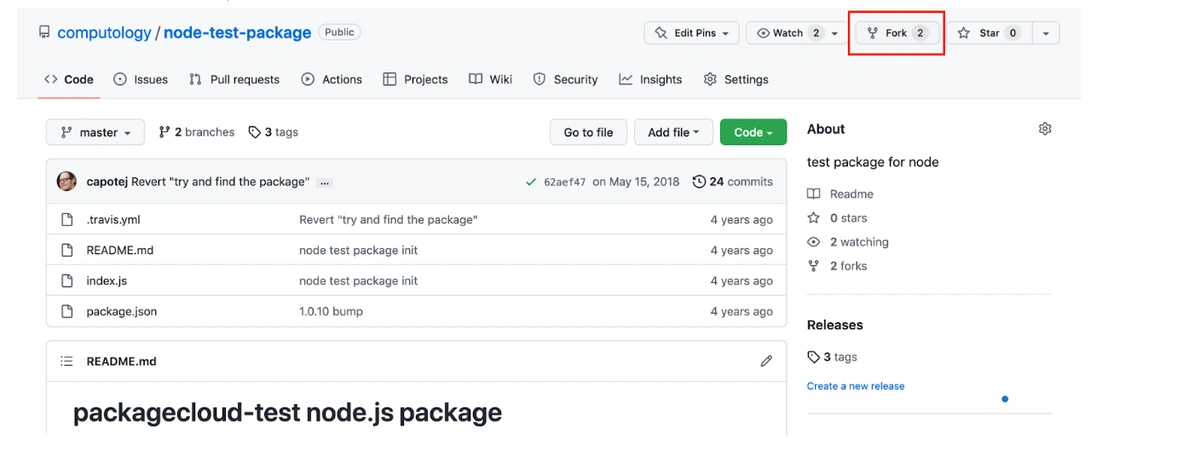
If you have no codebase (Situation 3), you can fork a Packagecloud GitHub code repository that we created to build an npm test package: https://github.com/computology/node-test-package/
Go to the repository and click ‘Fork’
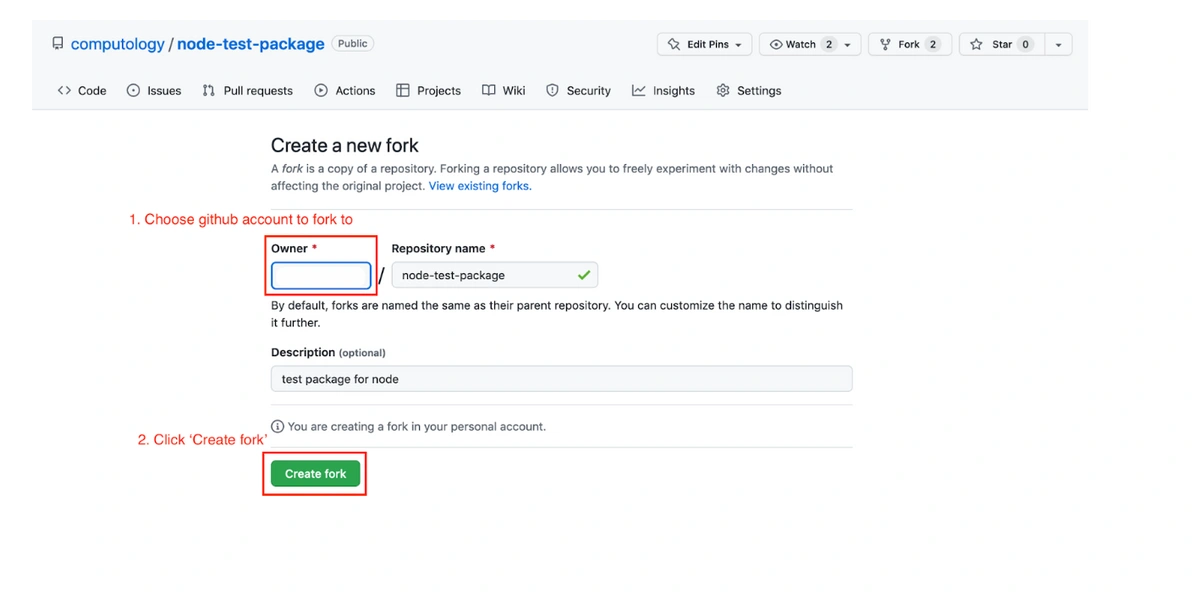
Fork the repository to another GitHub account
Create an account with Travis CI
Here we will make an account with Travis CI by signing up with GitHub. This will allow for Travis CI to access the npm test package repository we forked in the previous subsection.
From the Travis CI documentation:
- Go to Travis-ci.com and Sign up with GitHub (or Bitbucket, Gitlab, Assembla if your codebase is hosted there).
- Accept the Authorization of Travis CI. You’ll be redirected to GitHub.
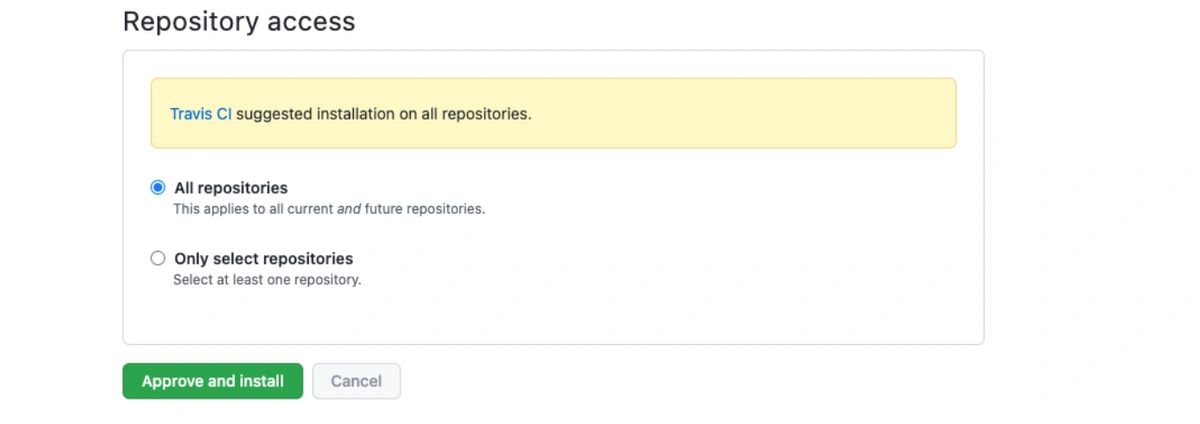
- Click on your profile picture in the top right of your Travis Dashboard, click Settings and then the green Activate button
- Select the repositories you want to use with Travis CI. Or you click the Activate all repositories using GitHub Apps button on the getting started page to just activate all your repos.
- You may need to select an appropriate Travis CI plan and follow the prompts to get started.

Add/Modify the .travis.yml build configuration file
Here is a sample config of how to integrate Travis CI into your codebase to build and publish your package to packagecloud.io.
Create a .travis.yml file
If needed, create a ‘.travis.yml’ file then add the following:
|
deploy: skip_cleanup: true |
There are five important details you need to note in the `deploy` step:
- `repository:` YOUR REPO
- Name of the repository you created in your Packagecloud account
- `username:` YOUR USERNAME
- Your Packagecloud username
- `token:` YOUR TOKEN
- Your Packagecloud API Token: https://packagecloud.io/api_token

- It is recommended to encrypt your API Token. Install the Travis CI command line client and run the following command in your project directory to insert the encrypted token to your .travis.yml:
|
travis encrypt THE-API-TOKEN --add deploy.token |
- `dist:` YOUR DIST
- For Debian or RPM: an OS/dist supported by Packagecloud, like `ubuntu/bullseye` or `centos/5`
- For npm: `node`
- For python: `python`
- For Java JAR, WAR, or AAR: `maven2`
- For Ruby Gems: leave blank
- `skip_cleanup: true`
- Before the release, Travis CI will clean up any additional files and changes you made.
- As you will generate an npm package that is intended to be released, you need to skip that cleanup.
Commit this .travis.yml file to your GitHub repository:
- `git add .travis.yml`
- `git commit -m “Add Travis CI build config file”`
- `git push origin master`
Example minimal configuration .travis.yml file
|
language: generic skip_cleanup: true |
Here, the `language` is set as `generic`, which is an image containing essential CI tools, Python, databases and services, go, node_js, ruby, jvm, php.
The `script` phase runs the build script: `npm pack`.
And after the npm package is built, the `deploy` phase provides all the configuration allowing Travis CI to push to your Packagecloud repository after a successful build.
Additional phases in the job lifecycle and deploy options
Branch to release from
You can explicitly specify the branch to release from with the on option:
|
deploy: |
Alternatively, you can also configure Travis CI to release from all branches:
|
deploy: |
By default, Travis CI will only release from the master branch. Builds triggered from Pull Requests will never trigger a release.
Specifying the package folder
By default, the packagecloud provider will scan the current directory and push all supported packages. You can specify which directory to scan from with the `local-dir` option. This example scans from the `build` directory of your project.
|
deploy: |
Alternatively, you may wish to specify the `package_glob` argument to restrict which files to scan. It defaults to **/* (recursively finding all package files) but this may pick up other artifacts you don’t want to release. For example, if you only want to push gems in the top level directory:
|
deploy: |
A note about Debian source packages
If the packagecloud provider finds any .dsc files, it will scan it and try to locate its contents within the local-dir directory. Ensure the source package and its contents are output to the same directory for it to work.
Conditional releases
You can deploy only when certain conditions are met. The Travis CI documentation expands more on Conditional Releases with `on:`.
Running commands before and after release
Sometimes you want to run commands before or after releasing a package. You can use the `before_deploy` and `after_deploy` stages for this. These will only be triggered if Travis CI is actually pushing a release.
|
before_deploy: "echo 'ready?'" |
Confirm build passed
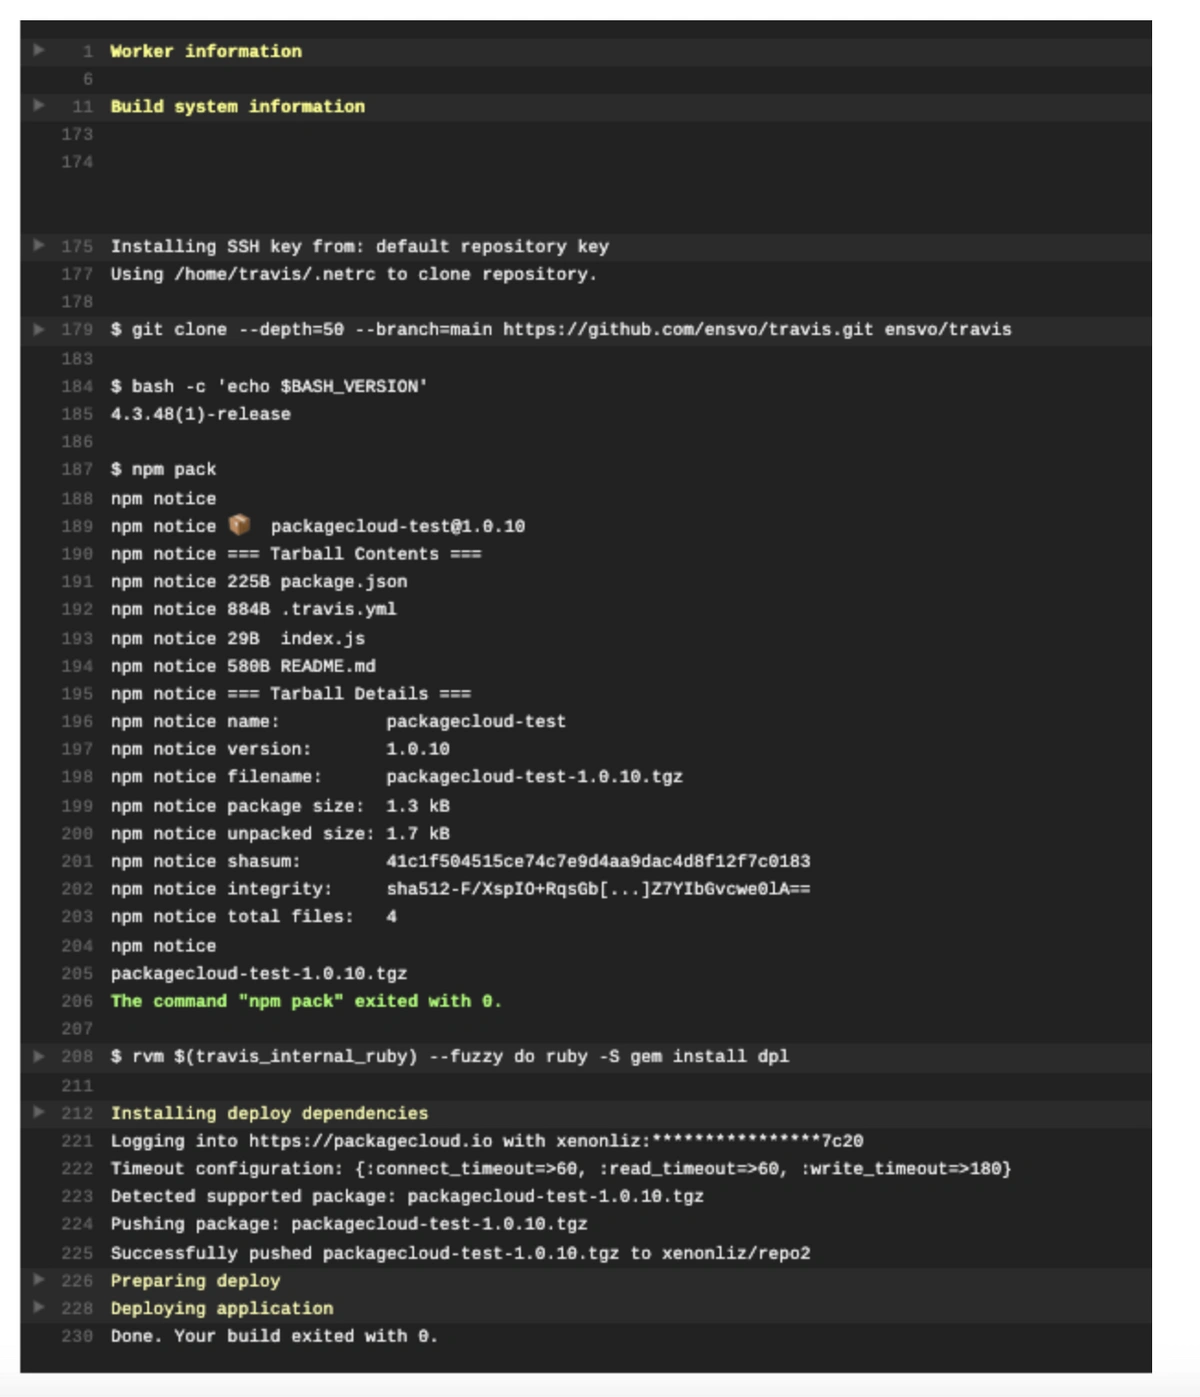
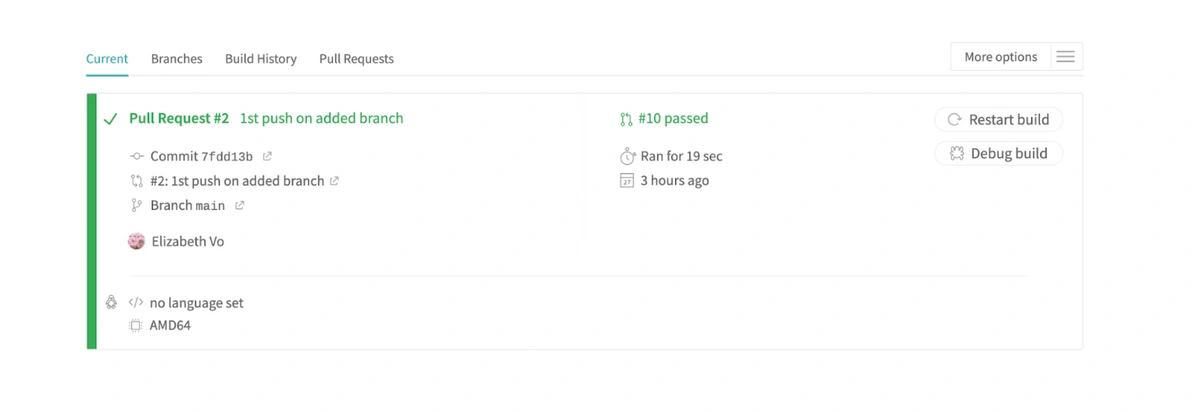
After making a push to trigger the Travis CI job lifecycle, you can review the build and deploy status by clicking on the build in the Travis CI Dashboard: https://app.travis-ci.com/dashboard
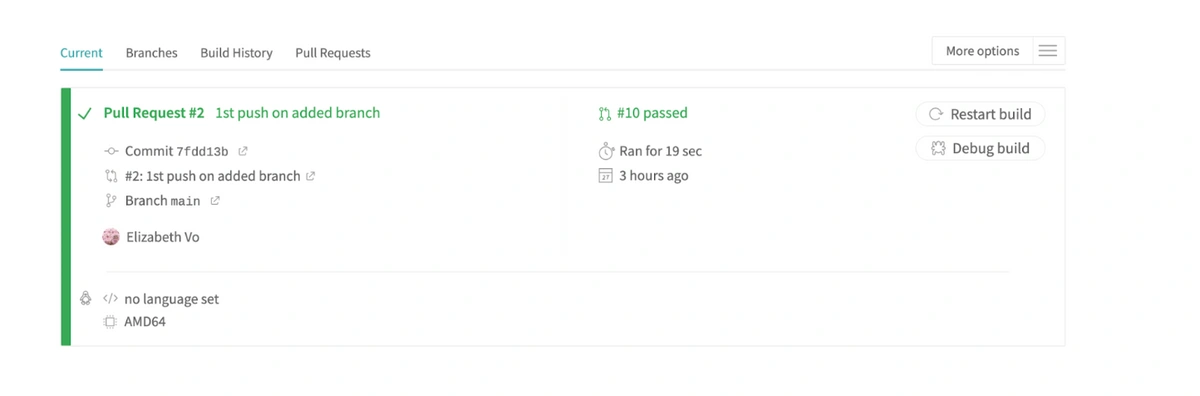
On Travis CI’s end in the virtual machine’s logs, we can see this build passed and the npm package was built and deployed to the repository in Packagecloud:
Confirm package push
Go to your Packagecloud repository with the url: https://packagecloud.io/<PACKAGECLOUD_USERNAME>/<PACKAGECLOUD_REPONAME>/
You should see your package that was built and pushed by Travis CI.

This article was initially mistakenly published on January 6th 2023 with Sudarshana (Sophie) Banerjee as the author but has now been revised to indicate the correct author, Elizabeth Vo.