Packagecloud works like a charm with your existing tech stack, and plays well with popular CI/CD tools currently available in the market.
Today, we will see how it is to integrate your Jenkins job with Packagecloud.
The prerequisites will be both Jenkin and Packagecloud credentials, to follow along.
To integrate your Jenkins job with packagecloud.io:
-
-
Create a repository in Packagecloud to store the software package that you will build
-
Download and Install the Packagecloud plugin in Jenkins
-
Create a domain and add Packagecloud credentials
-
Create a job
-
Trigger the build
-
Nomenclature
We use the word repository to refer to a code repository, e.g., GitHub, and also a package repository, e.g., Packagecloud.
We use the term package to refer to both software or programming libraries that maintainers/creators create for usage by others, with the subtle difference being the former refers to a piece of software that the end-user can use, e.g., a Slack desktop client, and the latter can be used as building blocks by developers to create software.
Create a repository on Packagecloud
There is a simple wizard that will guide you through creating a repository to store your packages. If you have already completed the wizard before and would like to create a new repository, log in to the platform. and click Create repository.

In the Create a repository modal, fill in the details as follows.

Create (Copy) a codebase that creates a package
For Case 3, you can ‘fork’ a Packagecloud GitHub code repository, that we already created to build an npm test package.
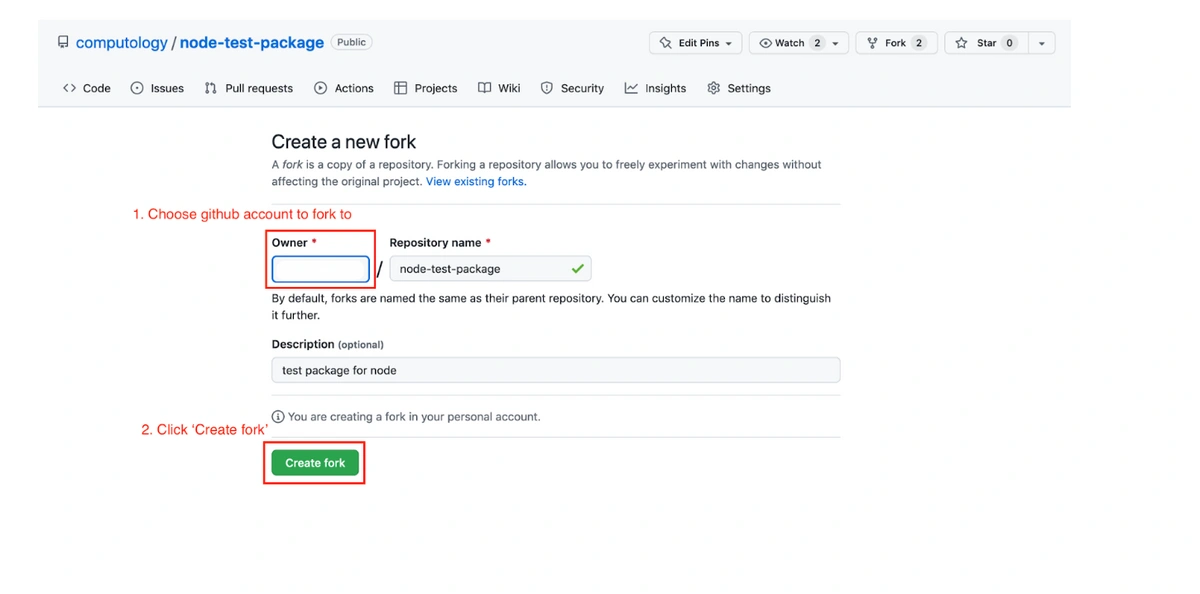
Go to the repository and click Fork.
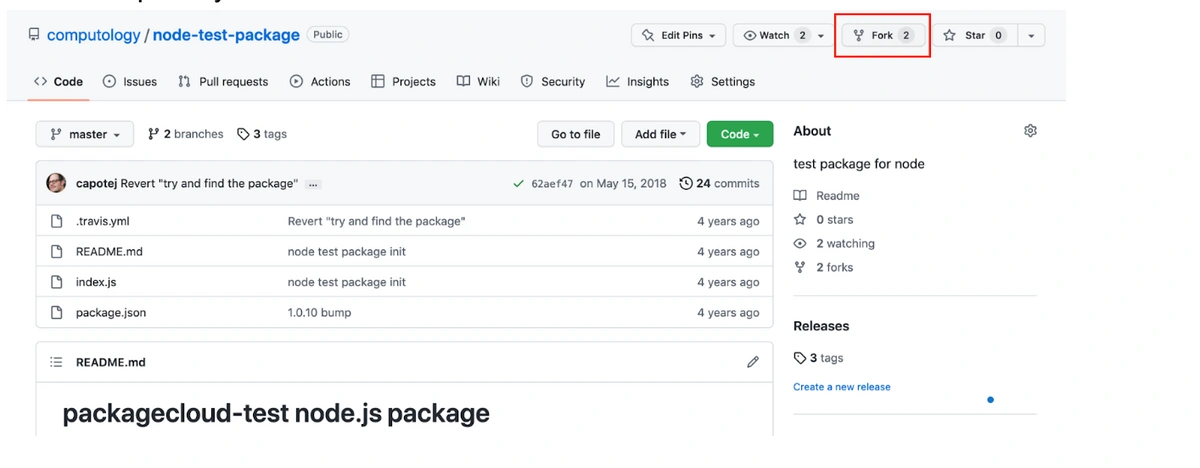
Fork the repository to another GitHub account
Install Packagecloud plugin for Jenkins
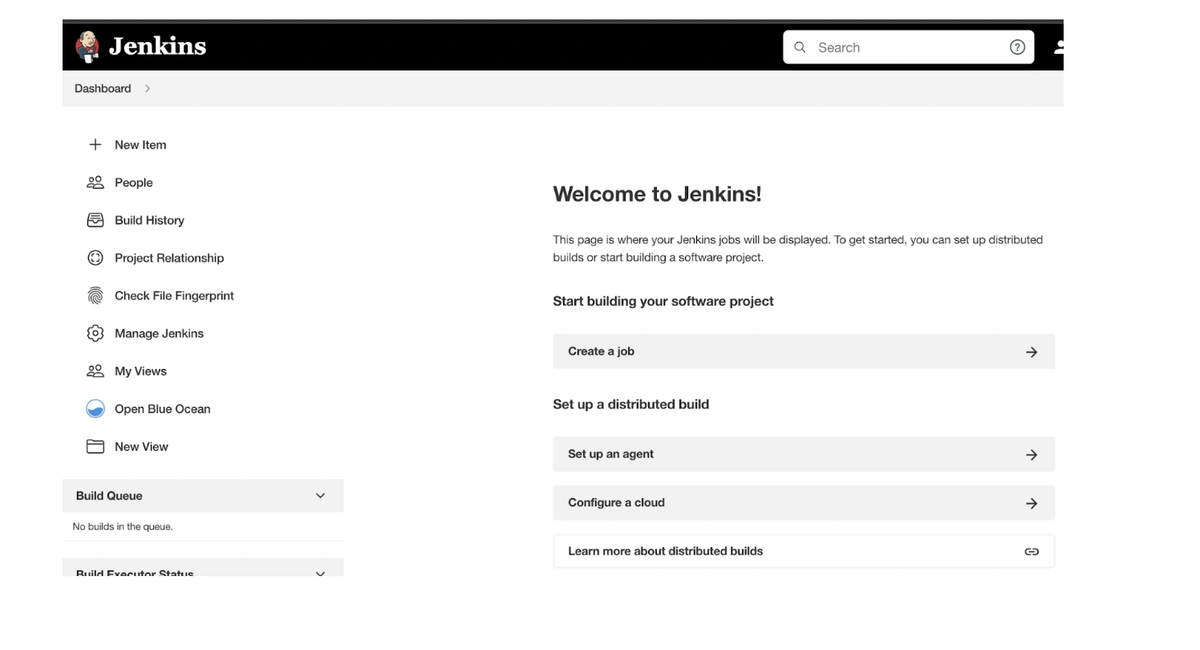
Once you have set Jenkins into your server for the first time you will see the following screen, if you haven’t set Jenkins, you can follow their instructions posted in their documentation. Jenkins supports most of the popular platforms.
Go to Manage Jenkins > Manage Plugins, search for the packagecloud plug-in under the Available section, select it and install it.
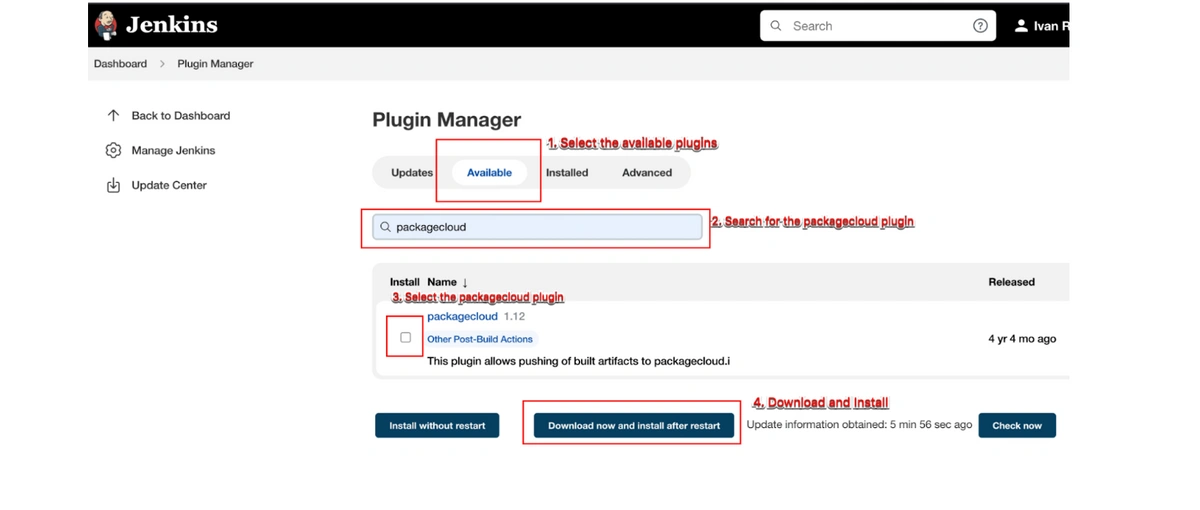
Once you download the plug-in, Jenkins will restart when installation is complete and no jobs are running, most likely you will need to sign in with your credentials one more time.
Add Packagecloud domain and credentials
Once you installed the Packagecloud plugin, you can go ahead and add Packagecloud domain and credentials, to do so go to Manage Jenkins > Manage Credentials.
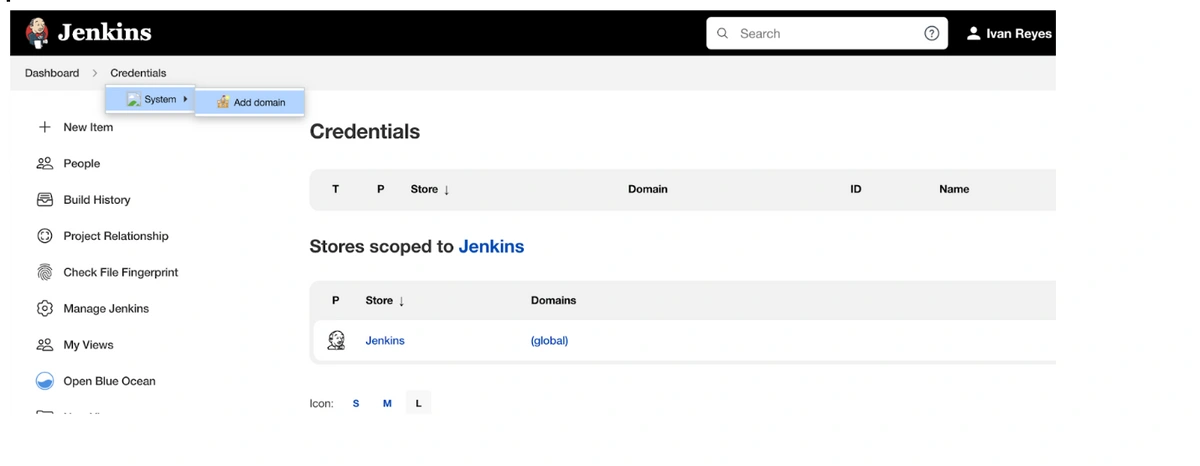
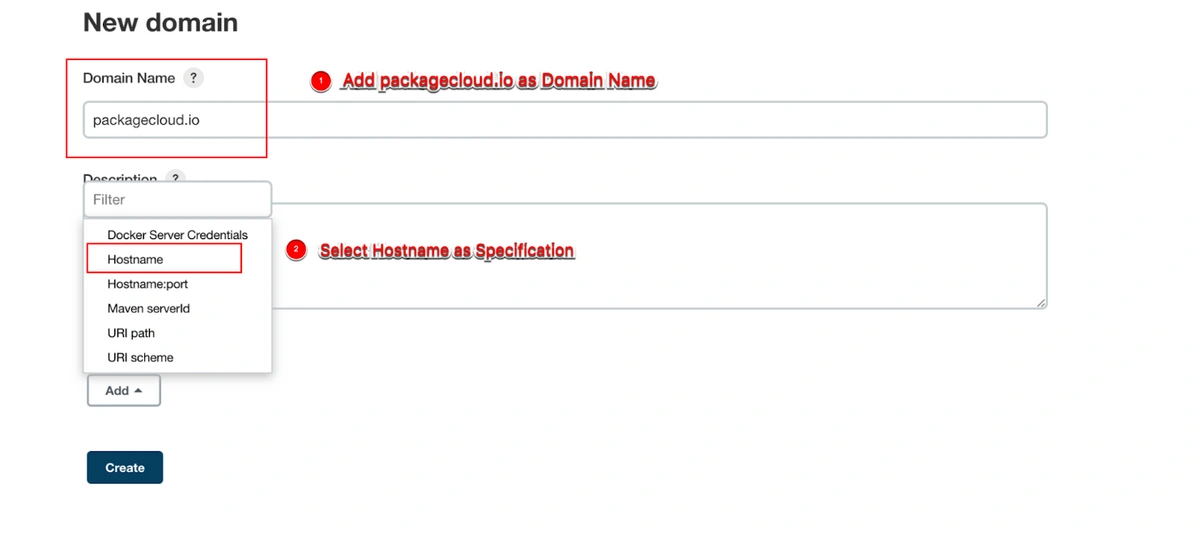
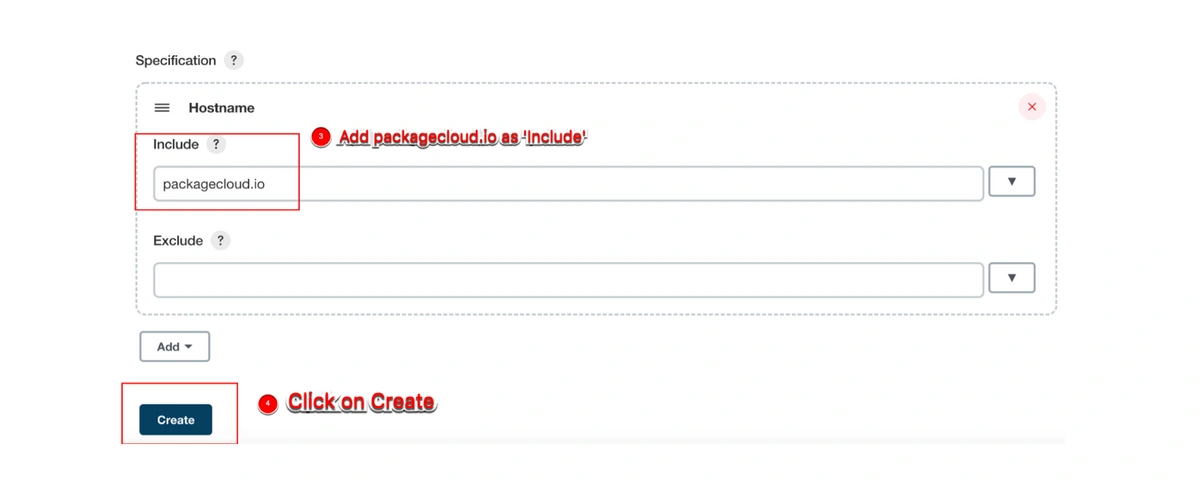
On the navigation bar that displays the route, hover over Credentials and select System on the drop down menu, then click on Add domain. Add packagecloud.io as Domain Name, then select Hostname as Specification and packagecloud.io as Include.
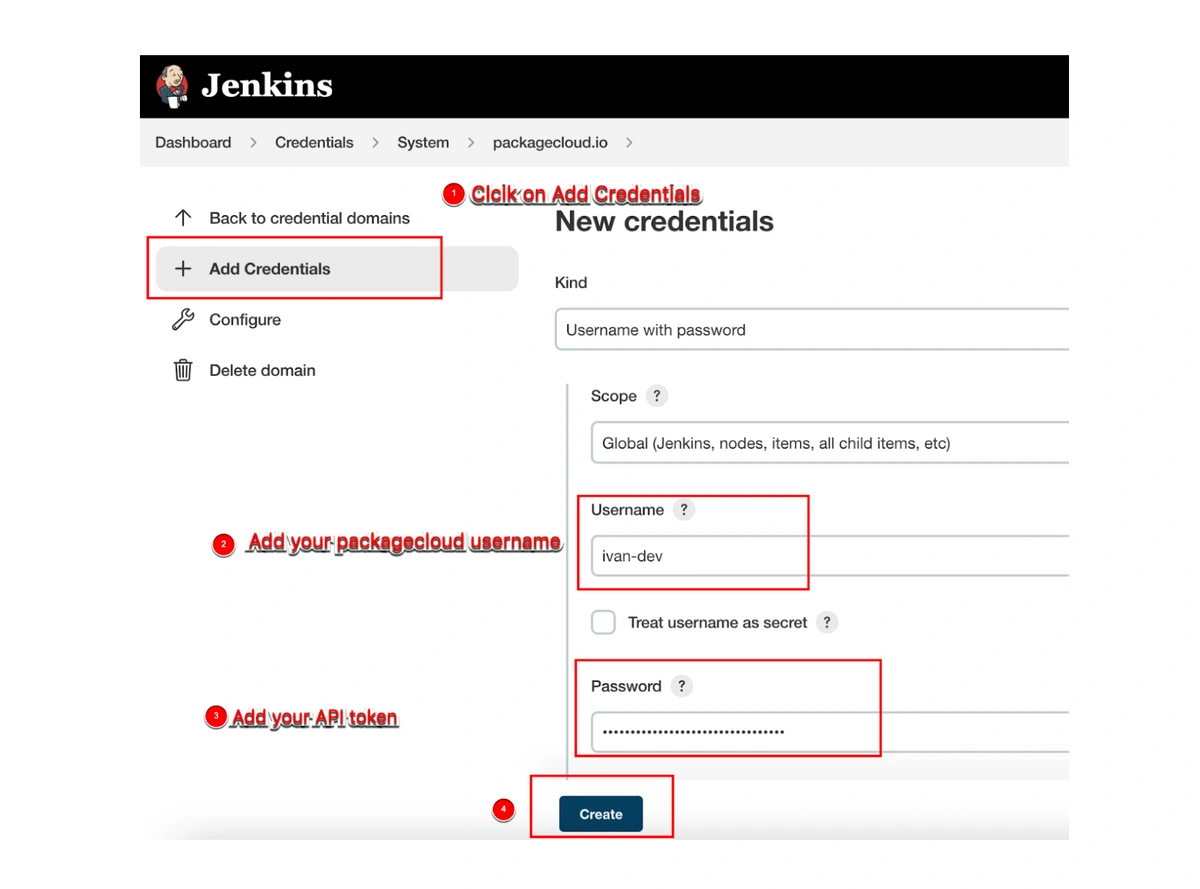
Once you add the domain, click on +Add Credentials, add your Packagecloud username and your API token as password (You can find your API token here.)
Create a Job
Now that we setted the Domain and credentials we are ready to create a new job, go to Dashboard > Create Job, name your job, select Freestyle project and click OK.
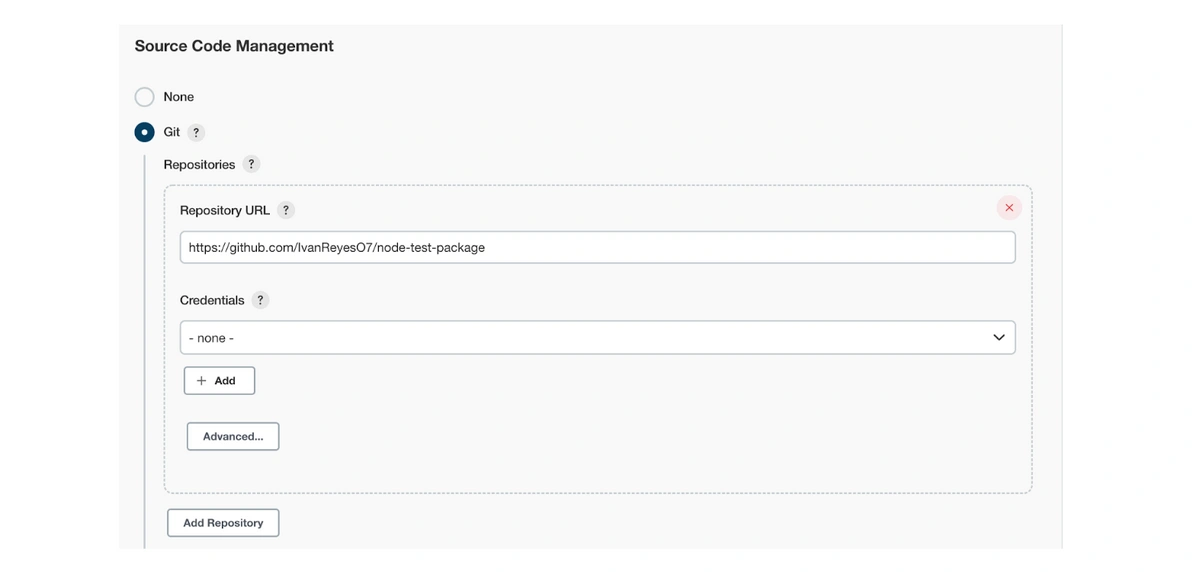
As Source Code Management we are going to use Git, and on Repository URL we will paste our GitHub repository where the source code of our package is hosted.
Source Code Management
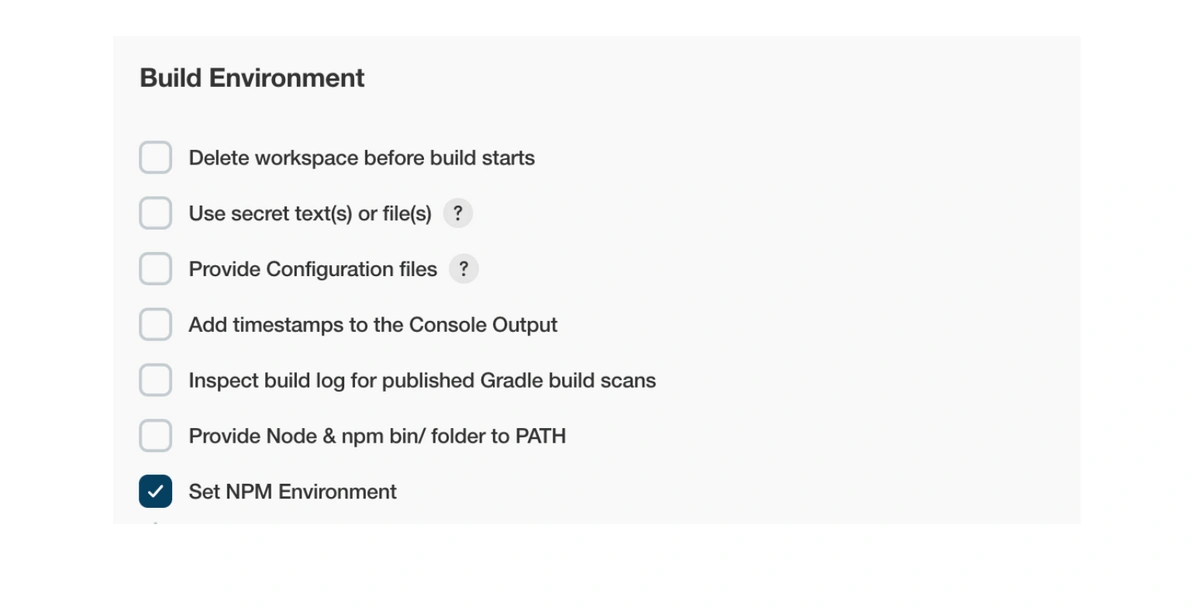
In the Build Environment we are going to set an NPM environment, since we are going to use npm to create the package.
Build Environment
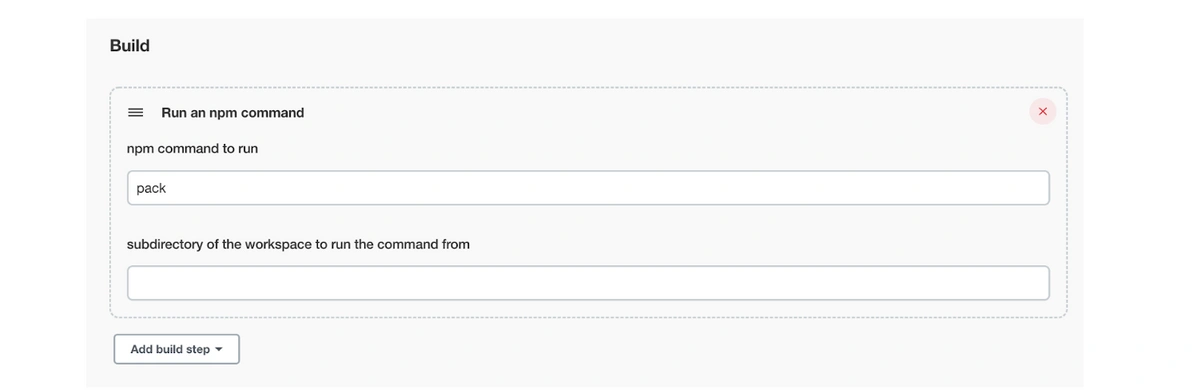
Build
Click on Add a build step, and select Run an npm command, which in our case is going to be npm pack.
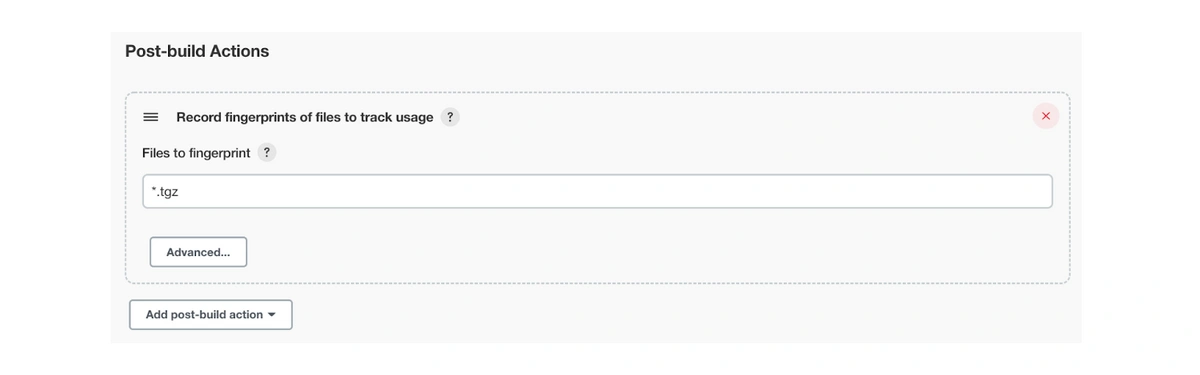
Post-build Actions
-
-
Click on Add post-build actions and select Record fingerprints of files to track usage. This will ensure that your build job is set to record fingerprints matching the artifacts you wish to upload. In this example, since this is a javaScript package, the format that we are going to use is .tgz.
-
Add another post-build action and select ‘push to packagecloud.io’. If you don’t see this option yet, you might want to check if the plug-in was installed successfully.
-
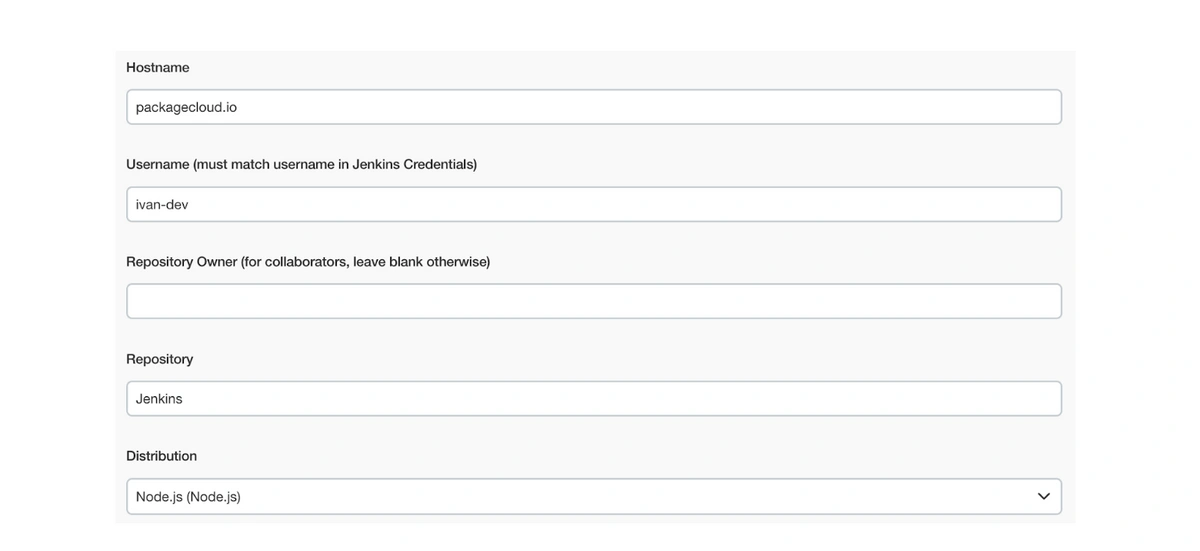
Add your Packagecloud username and the Packagecloud repository name you want, and the Distributionthis package was built for.
-
Click on Save and if you want to trigger the Build click on Build Now. This will schedule a Build process and if the configuration was accurate, the build will be successful.
-
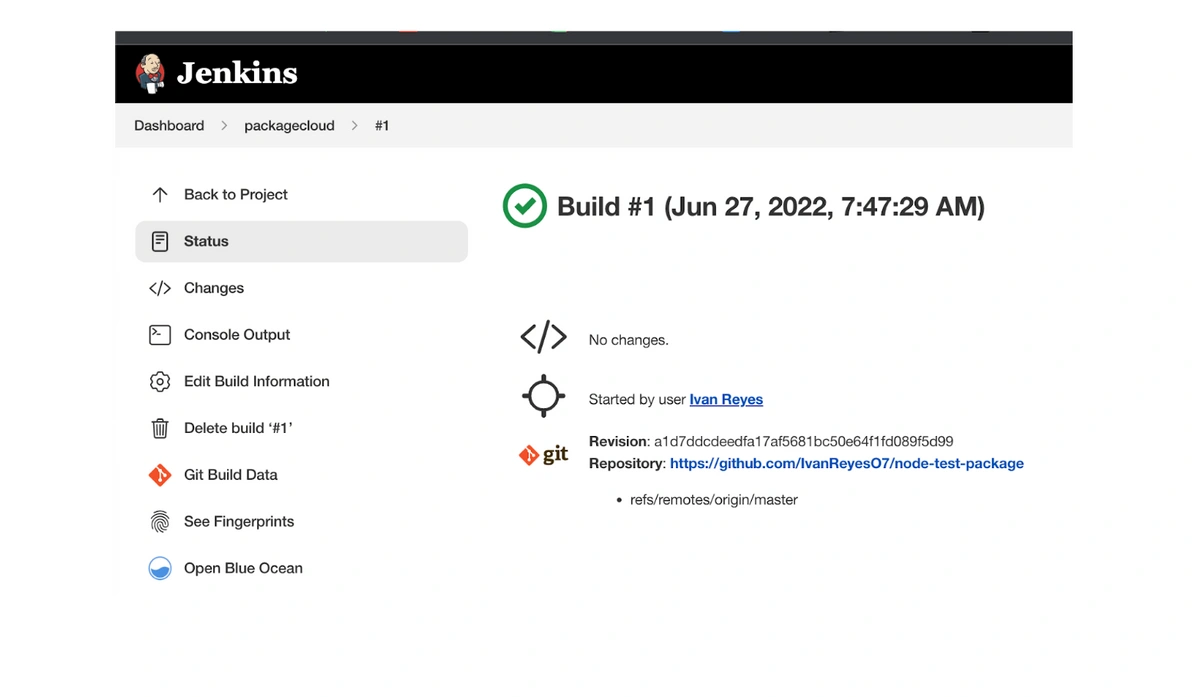
You can now check into your packagecloud repository and see if the package was pushed successfully.
Confirm Package Push
Go to your Packagecloud repository with the url: https://packagecloud.io/<PACKAGECLOUD_USERNAME>/<PACKAGECLOUD_REPONAME>/
You should see your package.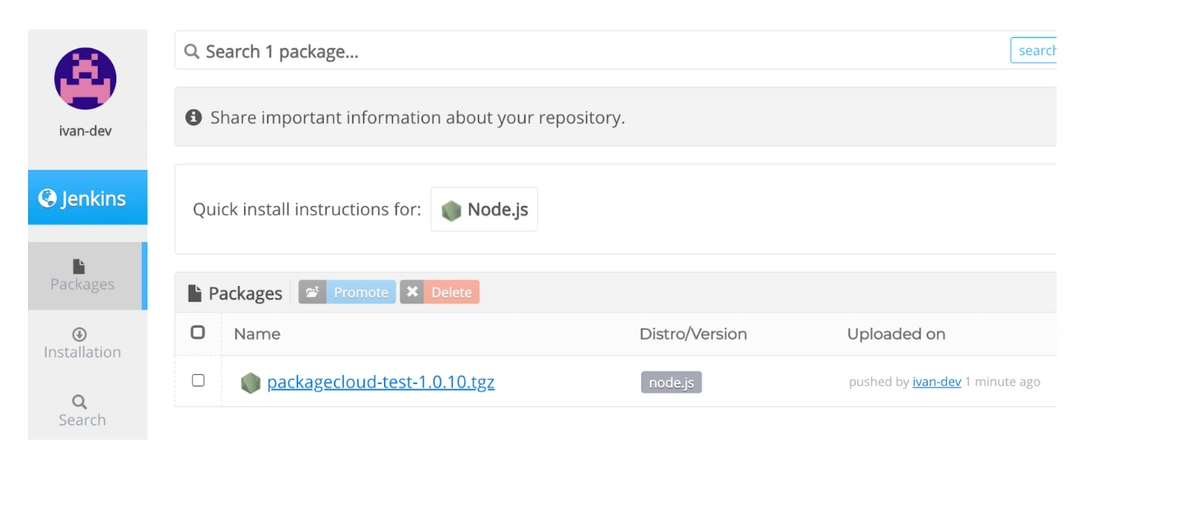
PS: If you do not see your package, check the build configuration and console to see which step of the build is failing. If you are still having trouble (a very, very unlikely scenario), please give us a shout, and we will be happy to help.
Happy developing!