Companies implement a continuous integration (CI) strategy to deploy, build, test, and release code incrementally. Once a release is ready, it will be tagged with a version number and published to a repository from where it can be easily installed with a few clicks by the user.
There is no simpler and better repository than Packagecloud for three reasons:
-
-
Packagecloud is technology-agnostic and works with your existing ecosystem. Packagecloud comes with out-of-the-box integrations with all the leading CI platforms, as well as build tools. Most programming languages and packages are supported as well.
-
Packagecloud is built by developers for developers. The entire software repository management can be done from within the Command Line Interface. Developers not only get step-by-step instructions, like this one for Buildkite, scripts for common package management tasks are also provided; with little to no need for additional coding. REST API and supporting documentation are available for common tasks.
-
Packagecloud does the heavy lifting for end users. Users can easily install those packages with Packagecloud’s install scripts, removing the need to understand the operating system where the package will be installed.
-
Here’s how you can integrate your Buildkite workflow with Packagecloud:
-
-
Log in to Packagecloud, and create a repo. This repo will store the software package.
-
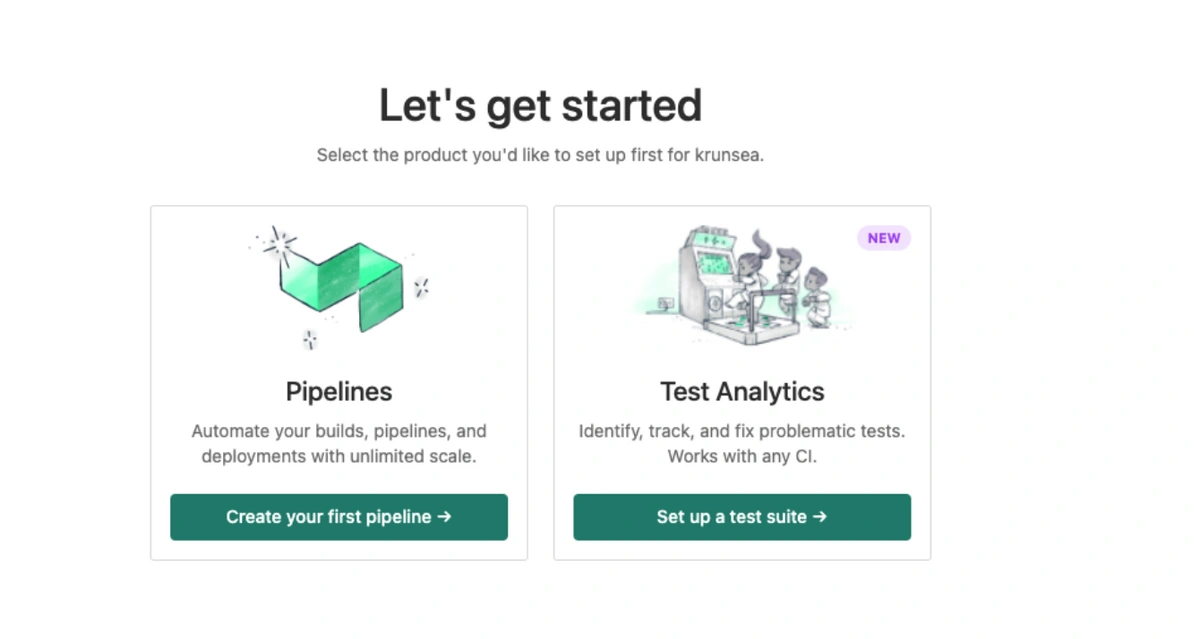
Create a pipeline from the Pipelines page of Buildkite using the ➕ button.
-
Configure the Buildkite Agent.
-
Retrieve the packagecloud API key and add it to the Buildkite environment variable. This lets Buildkite access your software in Packagecloud.
-
Nomenclature
Repository refers to a code repository, e.g., GitHub, and also a package repository, e.g., Packagecloud.
Package refers to both software or programming libraries that maintainers/creators create for usage by others, with the subtle difference being the former refers to a piece of software that the end-user can use, e.g., a Slack desktop client, and the latter can be used as building blocks by developers to create software.
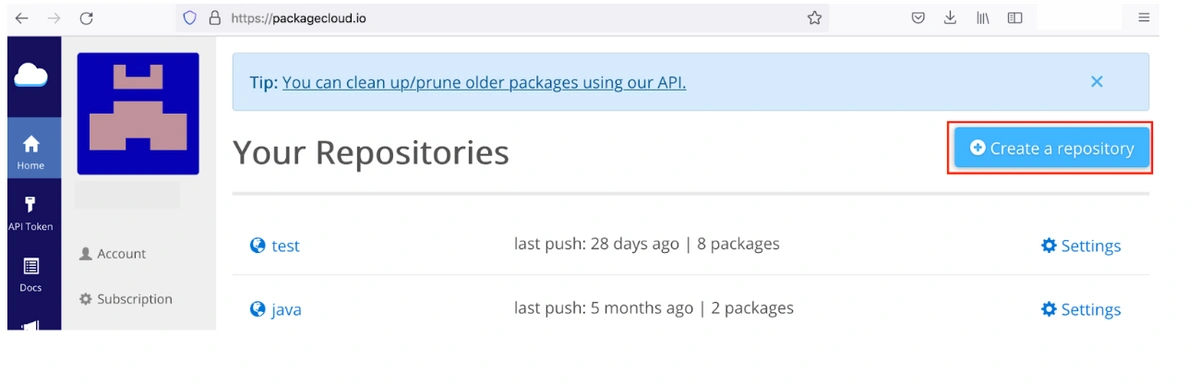
1. Create a repo
- Log in to your Packagecloud account.
- Create a new repo. If this is your first time using Packagecloud, just follow the wizard.
Click ‘Create repository’.
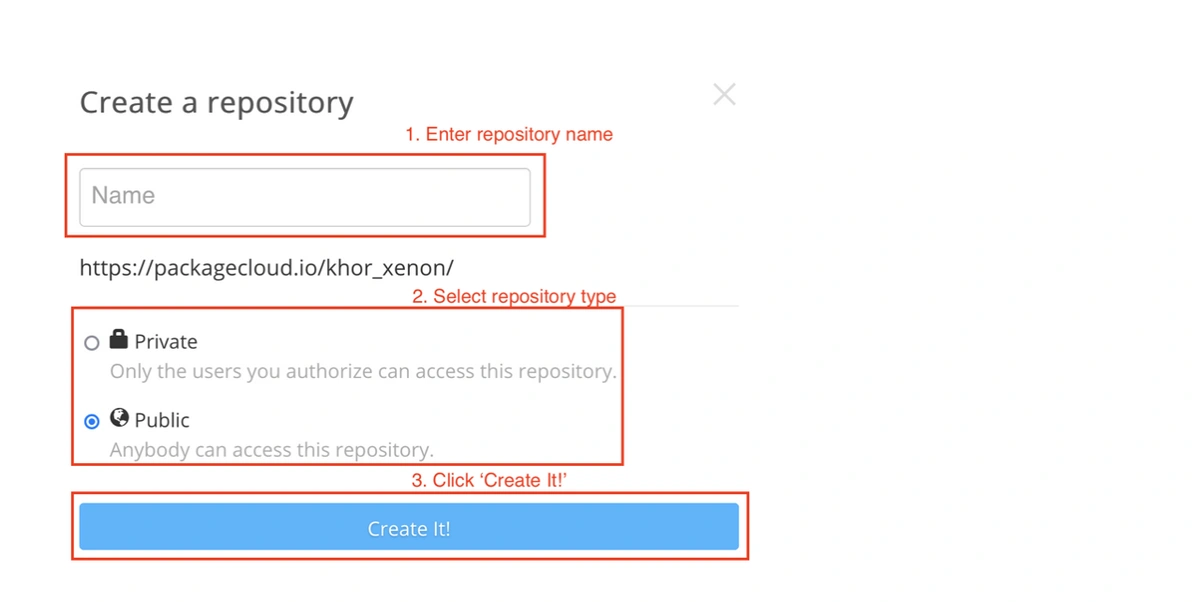
In the ‘Create a repository’ modal, fill in the details as follows.
Add script to create a package
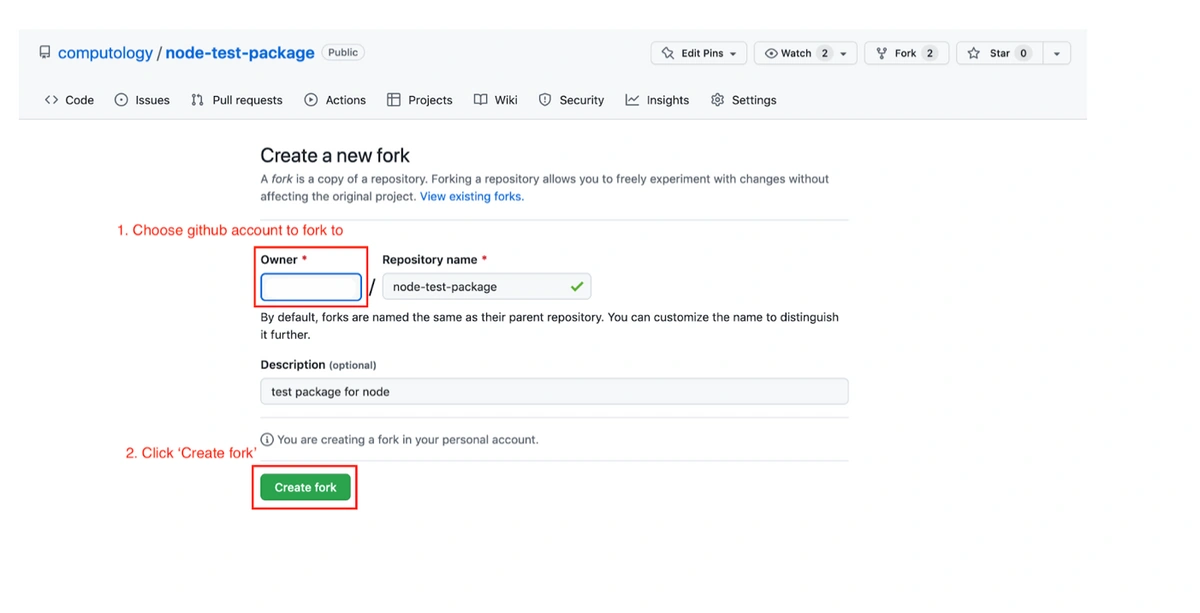
If you are looking for a sample package you can use the Packagecloud test package on GitHub, here’s how to do this:
Open the package in GitHub, and click Fork.

Fork the repository to another GitHub account.
2. Create a pipeline in Buildkite
Once you have a Buildkite account set up and have a build agent (or agents) running (either locally, or in the cloud) , it’s super simple to create a pipeline to set, build and publish a package.
Connect your Buildkite account with your GitHub, set a name for your build, select the repository that is hosting the package code and add the steps for the building and publishing of the package.
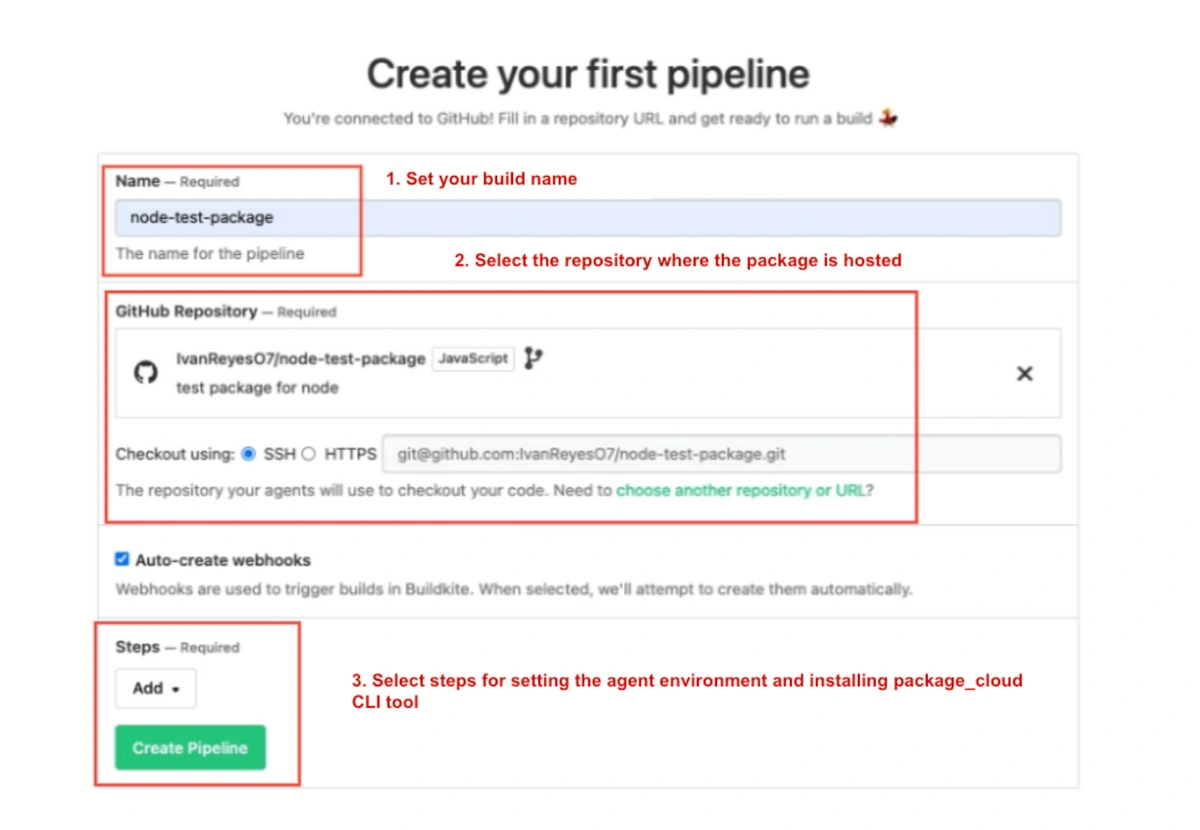
Don’t add any steps just yet, click Create Pipeline.
Once your pipeline has been created, click on it, and then click Edit Steps.
If prompted, click on Convert to YAML Steps.
This is the newer way of configuring pipelines.
The web steps visual editor will be deprecated in the future.
Paste the following YAML in the YAML steps editor, and click Save Steps:
steps:
  - label: ":pipeline: Pipeline Upload"
    command: buildkite-agent pipeline upload
This step looks in the repository for a directory named .buildkite containing a file named pipeline.yml.
Any steps in that file will be appended to the pipeline definition, basically allowing us to define our pipeline in our repository.
To see this in action, let’s add a YAML pipeline definition file to our repository.
Add a new file to your repository at the following location:
.buildkite/pipeline.yml
Paste the following YAML definition into the file.
  steps:
- command: "apt update\napt install -y ruby ruby-dev rubygems build-essential npm sudo\ngem install package_cloud"
    label: "PreBuild"

  - command: " echo '{\"url\":\"https://packagecloud.io\",\"token\":\"'\\$YOUR_TOKEN'\"}' > ~/.packagecloud"
    label: "packagecloudCredentials"
    env:
      TOKEN: $YOUR_TOKEN

  - command: "npm pack\package_cloud push your_packagecloud_username/your_packagecloud_repository/node/1 packagecloud-test-1.0.10.tgz\n"
    label: "buildAndPublish"
Now commit and push this change to GitHub.
3. Set up an agent in your own host
Next, it’s time to get a Buildkite agent running in your own infrastructure. Click on the Agents tab in the UI navbar to see your options:

Clicking on any of the listed options will show the agent quick start guide.
Let’s use Ubuntu as an example.
First, add our signed apt repository:
sudo sh -c 'echo deb https://apt.buildkite.com/buildkite-agent stable main > /etc/apt/sources.list.d/buildkite-agent.list'
sudo apt-key adv --keyserver hkp://keyserver.ubuntu.com:80 --recv-keys <key>
Then install the agent:
sudo apt-get update && sudo apt-get install -y buildkite-agent
Then configure your agent token:
sudo sed -i "s/xxx/<token>/g" /etc/buildkite-agent/buildkite-agent.cfg
And then start the agent: Ubuntu 15.04 and above (systemd)
sudo systemctl enable buildkite-agent && sudo systemctl start buildkite-agentOlder Ubuntu (upstart)
sudo service buildkite-agent startYou can view the logs at: Ubuntu 15.04 and above (systemd)
journalctl -f -u buildkite-agentOlder Ubuntu (upstart)
tail -f /var/log/upstart/buildkite-agent.log4. Trigger the package building and deployment
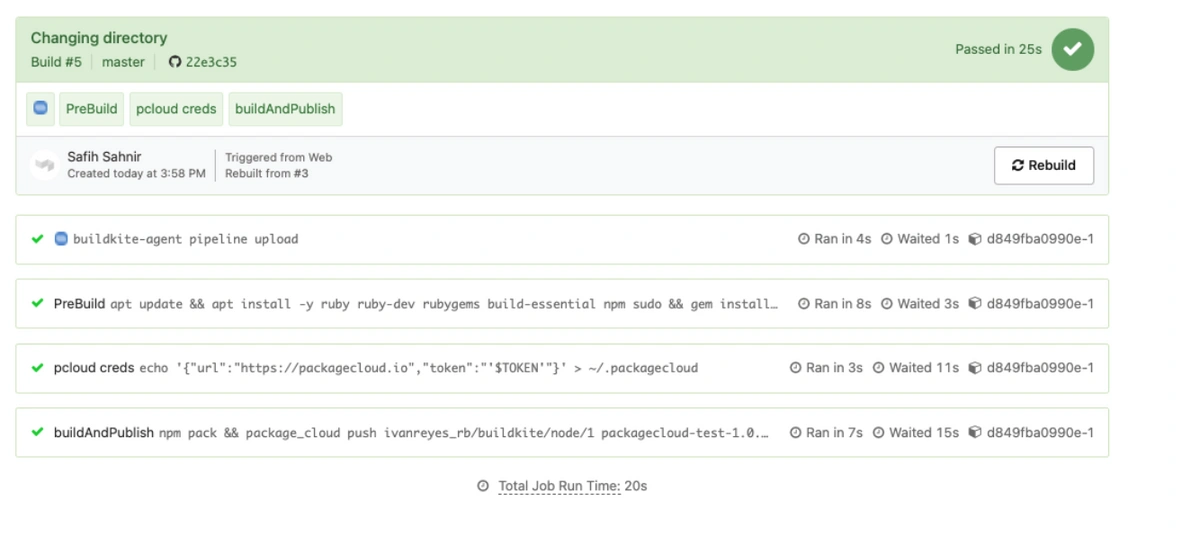
One you have your agent and your build setup you can push code to the branch that you selected, this will trigger the build and execute the steps indicated in the configuration of the pipeline.
5. Confirm Package push
Go to your Packagecloud repository with the url: https://packagecloud.io/<PACKAGECLOUD_USERNAME>/<PACKAGECLOUD_REPONAME>/
You should see your package.
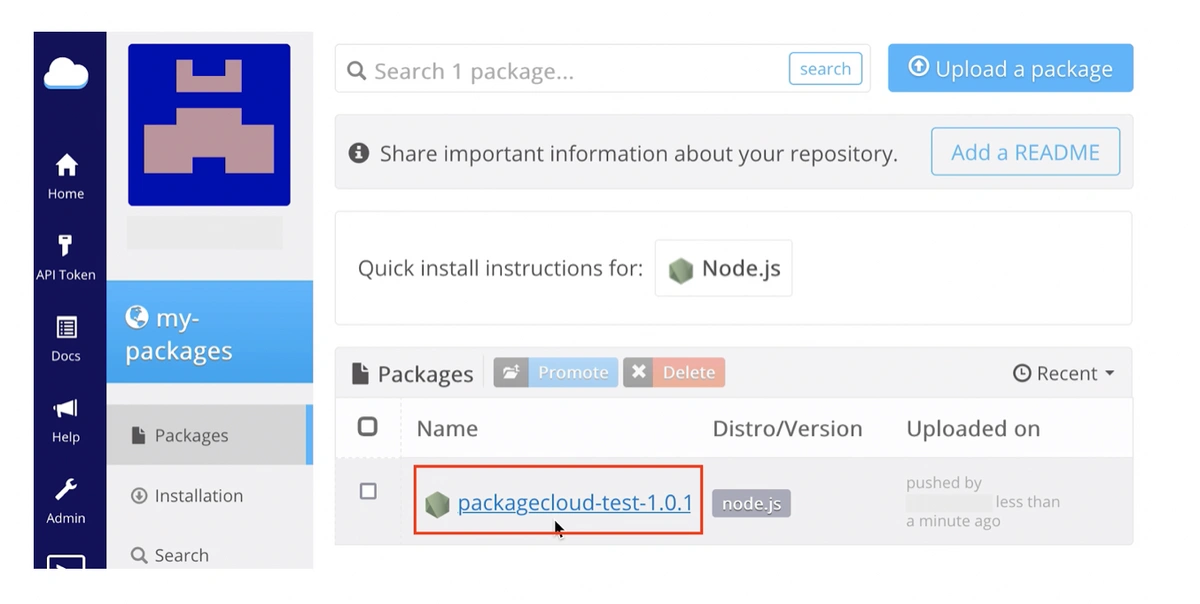
Now, wasn't that fast!
This article was written in collaboration with Buildkite and Packagecloud engineers Ivan Reyes and Elizabeth Vo.